
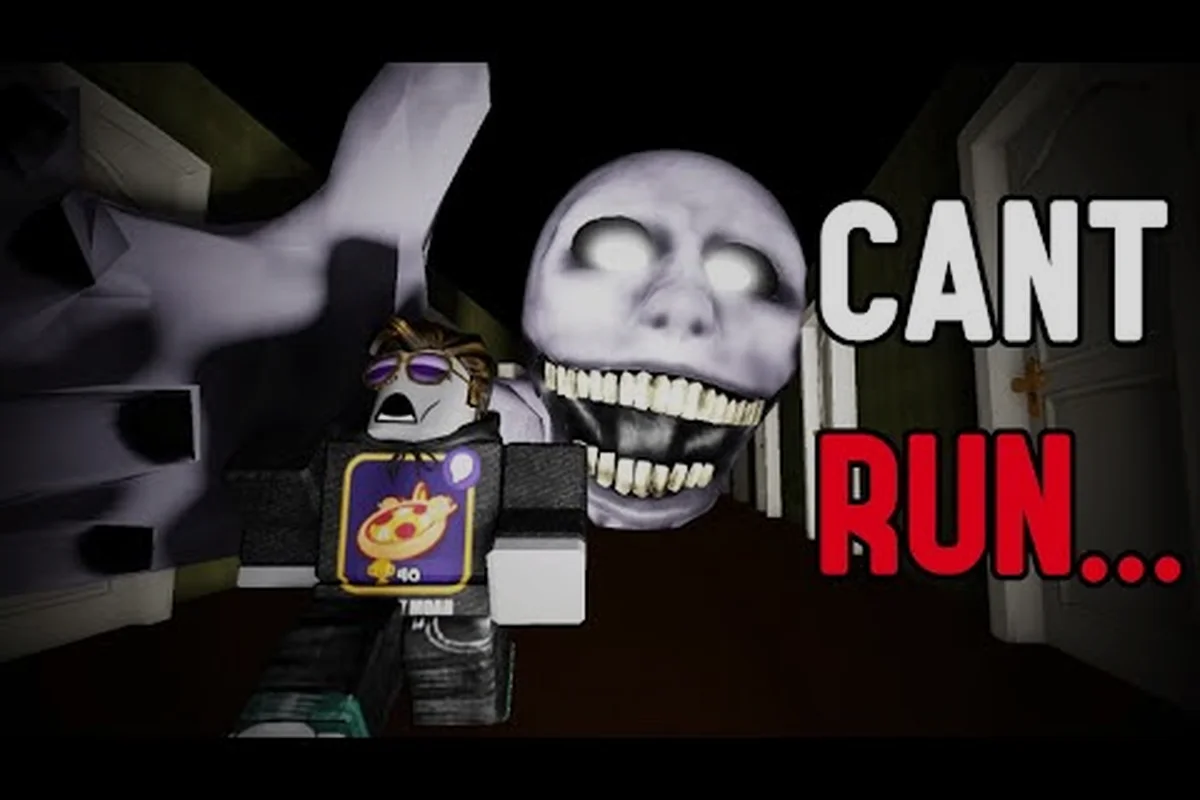
PETAPETA hides its scares in plain sight, and this PETAPETA jump scare guide exists because most players lose their first run to a scare they never saw coming. Knowing where the monster spawns, what sound cues it, and how to keep your hands steady is the difference between a clean escape and a panic restart.
For a closer look at the exact timing and visual cues of the scare, the PETAPETA jump scare guide video walks through the sequence frame by frame.
How PETAPETA jump scares actually work
PETAPETA does not rely on random noise bursts. Every scare is tied to a trigger, and once you understand the trigger system, the game becomes far less punishing. The community shorthand for this is the "hollow" system: the game quietly tracks your position, your light source, and how long you have lingered in one spot, then fires the scare when the conditions line up. According to community reports, most scares are positional triggers rather than timers, which is why standing still often feels safer than running.
| Trigger input | What the game tracks | Typical scare response | Counter-play |
|---|---|---|---|
| Positional (movement) | Player coordinates vs. trigger volume | Fires on entry, not on a timer | Stop before the volume edge, walk the perimeter |
| Light source | Equipped light / ambient drop | Warning cue audio cut, then reveal | Kill the light, wait out the hum |
| Dwell time | Seconds spent in one spot | Delayed positional trigger | Short shuffle instead of long stand |
| Ambient audio drop | Sudden silence in the mix | 1-2 s warning before visual | Treat silence as the cue, pre-move |
| Commit window | Input state during 0.5 s window | Scare locks in if no movement | Hold input, then move on reveal |
| Recovery stun | Post-reveal state | Sprint disabled briefly | Do not panic-sprint into the next trigger |
The core mechanic is simple to describe but hard to master under pressure. Each scare event has three phases: a warning cue, a commit window, and the monster reveal. The warning cue is almost always audio — a low hum, a distant scrape, or a sudden drop in ambient sound. The commit window is the half-second where you can still move. The reveal is the part that gets clipped into highlight reels.
-
Warning cue: audio-first, usually 1-2 seconds before the visual
-
Commit window: roughly 0.5 seconds where movement still cancels the scare
-
Reveal: the monster model appears, and the scare is locked in
-
Recovery: a short stun where your character cannot sprint
That recovery window is the real killer. Players who panic during the reveal often lose more time to the stun than to the scare itself, which is why learning to hold your input matters as much as learning to dodge. If you want a broader breakdown of how the monster roster behaves, the monster encounters and death scenes breakdown covers each creature's behavior in more detail.
The warning cue is almost never visual
New players instinctively watch the screen for movement, but PETAPETA's scares are designed to punish that habit. The audio mix pushes the warning cue to the front of the soundscape while the visual stays quiet, so a player watching for motion will miss the tell entirely. Turning your headset up and your brightness down is a legitimate strategy, not a meme. Community testing suggests the audio cue is present in every scripted scare in the game, though ambient scares in later levels are quieter and easier to miss.
Why the scare feels unfair the first time
The first encounter with any scare in PETAPETA is designed to feel like a gotcha, because the game wants you to flinch. That is intentional design, not a bug. The second encounter is where the actual skill test begins, since the trigger is now known and the only variable is your reaction. Players who replay a level after a scare typically clear it on the next attempt, which is the clearest evidence that knowledge — not reflexes — is the real difficulty gate.
Where the scares trigger, level by level
Scare density is not evenly distributed across PETAPETA's levels. Early levels teach the language of the game with a handful of gentle scares, mid-game levels escalate sharply, and the final stretch leans on ambient dread rather than loud reveals. The table below summarizes how the scare load feels across the campaign, based on community playthrough reports. Exact trigger positions vary slightly by platform and patch, so treat these as directional rather than frame-perfect.
| Level range | Scare density | Dominant scare type | Prep priority |
|---|---|---|---|
| Levels 1-2 | Low | Single scripted reveal | Learn the audio cue |
| Levels 3-4 | Medium | Positional triggers in corridors | Keep moving, avoid dead ends |
| Levels 5-6 | High | Multi-stage chases | Memorize exit routes |
| Levels 7-8 | High | Ambient + sudden reveals | Manage light source |
| Level 9 | Medium | Psychological buildup | Patience over speed |
| Level 10 | Medium-High | Finale set pieces | Full route knowledge |
The jump from level 4 to level 5 is the sharpest difficulty spike in the game, and it catches most players off guard because the first four levels lull you into a false sense of safety. If you are stuck on the last stretch, the level 10 and finale walkthrough breaks down the ending sequence step by step, including the scare placements that trip up first-time players.
Corridor scares in the mid-game
Levels 3 through 6 love corridors, and corridors are where positional triggers shine. The game places a scare at the end of a long sightline, waits for you to commit to walking forward, then fires. The counter is counterintuitive: hug the walls and move in short bursts rather than sprinting down the middle. Sprinting commits you to a straight line, and a straight line is exactly what the trigger is looking for.
Ambient scares in the late game
By level 7, PETAPETA shifts tactics. Instead of loud reveals, it uses sound design pressure — footsteps that do not belong to you, doors that close on their own, and a monster that appears in your peripheral vision only to vanish. These scares are less about startling you and more about making you second-guess your route, which slows you down and makes the real triggers easier to land.
How to avoid jumpscares in PETAPETA without ruining the game
Avoiding scares is not the same as skipping them. The goal is to stay in control when a scare fires, not to remove the tension that makes PETAPETA worth playing. The strategies below are drawn from community experience and hold up across multiple playthroughs. They work because they target the trigger conditions rather than the reveal itself.
-
Walk, do not sprint, through unfamiliar rooms — sprinting commits you to a path the trigger system predicts
-
Keep your light source steady — flickering light is a tell that a scare is queued nearby
-
Listen before you enter — a half-second pause at a doorway reveals the warning cue
-
Never backtrack blindly — the game re-arms some triggers when you re-enter a room
-
Learn one exit per room — panic routing is the number one cause of death after a scare
The single highest-value habit is the doorway pause. Standing just outside a room for one second gives the audio cue time to play, and the cue almost always tells you whether the room is safe. Players who adopt this habit report far fewer deaths in the mid-game, and it costs almost no time once it becomes automatic.
Managing the stun window
After a scare fires, your character enters a brief stun. The instinct is to mash movement inputs, but that actually extends the recovery on some platforms. Instead, release all inputs for a beat, then move. This sounds trivial, but it is the difference between recovering in half a second and recovering in a full second and a half, and that extra second is often enough for a follow-up trigger to land.
When to accept a scare and move on
Not every scare is avoidable, and chasing a perfect no-scare run will burn you out. Some triggers are scripted to fire regardless of your route, and the correct response is to eat the scare, recover cleanly, and keep your route intact. Treating unavoidable scares as part of the level design rather than a personal failure keeps your decision-making sharp for the ones you can actually dodge.
Building a scare-resistant loadout and route
Preparation matters more than reaction time in PETAPETA, and the prep layer is where most players leave value on the table. Before you enter a level, you should know three things: your light source, your exit route, and your recovery plan. The table below maps prep items to the scare types they counter, based on how the trigger system behaves in practice.
| Prep item | Counters | Why it works |
|---|---|---|
| Steady light source | Ambient scares | Removes flicker tells that bait panic |
| Memorized exit route | Chase scares | Lets you move without scanning |
| Doorway pause habit | Positional triggers | Gives the audio cue time to play |
| Input-release recovery | Stun window | Shortens post-scare downtime |
| Short-burst movement | Corridor triggers | Breaks the straight-line prediction |
Route planning is the most underrated piece. A route you have walked once is a route you can walk under pressure, and pressure is exactly when the scare system is strongest. If you want to understand how the game's broader systems interact with scare triggers, the full game mechanics overview explains the underlying rules that drive both puzzles and scares.
Practice routes before you need them
The best time to learn a route is when nothing is chasing you. Walk each level once at a slow pace, note where the audio cues fire, and mark the exits. That single slow lap converts a scary level into a known quantity, and known quantities are far easier to survive than surprises. Community players consistently report that their death count drops sharply after one deliberate practice lap per level.
Light management as a scare tool
Light is not just visibility in PETAPETA — it is a scare modifier. Bright, steady light suppresses some ambient triggers, while flickering or failing light signals that a scare is queued. Keeping your light source topped up is therefore a defensive action, not just a convenience. If your light starts to stutter, treat it as a warning and slow down rather than speeding up.
Reading the scare design so it stops working on you
The most durable way to handle PETAPETA's scares is to understand the design intent behind them. Scares in this game are built on anticipation, not surprise. The game wants you to feel the scare coming, dread it, and then have it land anyway. Once you recognize that pattern, the dread loses its grip, because you stop being surprised and start being prepared.
-
Anticipation scares build slowly and reward patience
-
Punishment scares fire when you break a rule, like sprinting a corridor
-
Set-piece scares are scripted and unavoidable, so plan around them
-
Ambient scares test your nerve, not your reflexes
Knowing which category a scare belongs to tells you exactly what to do. Anticipation scares want you to rush, so you slow down. Punishment scares want you to break formation, so you hold your route. Set-piece scares want you to panic, so you recover cleanly and keep moving.
The second playthrough is the real tutorial
Almost every player reports that PETAPETA becomes a different game on the second run. The scares still fire, but they no longer control your decisions, because you know where they are. That shift is the entire point of this guide: the first run teaches you fear, and the second run teaches you the level. If you are chasing completion rewards alongside your scare practice, the unlockables and rewards guide shows what carries over between runs.
Scare frequency versus scare intensity
A common misconception is that later levels are scarier because they have more scares. In practice, later levels have fewer scares but each one is more intense and better placed. The game trades quantity for precision, which is why level 9 feels calmer than level 6 even though it is objectively harder. Understanding that trade-off helps you calibrate your nerves: a quiet level is not a safe level.
Frequently Asked Questions
Can you turn off jump scares in PETAPETA?
There is no official toggle for disabling scares, and community reports confirm the trigger system is baked into level design rather than exposed as a setting. The practical workaround is lowering your volume during known trigger zones, though this also removes the warning cues that help you avoid scares in the first place.
Which level has the most jump scares in PETAPETA?
Levels 5 and 6 carry the highest scare density, combining corridor triggers with multi-stage chases. Level 7 has fewer scares but leans heavily on ambient dread, which many players find more stressful than the loud reveals. Density and intensity peak in different places, so the scariest level depends on what unsettles you.
Do jump scares ever actually kill you?
Most scares do not deal damage directly, but the post-scare stun window can leave you exposed to a follow-up trigger or hazard. Treat the stun as the real threat and practice releasing your inputs immediately after a scare fires. Players who recover cleanly rarely die to the scare itself.
Is it possible to predict where a scare will trigger?
Yes, with practice. Every scripted scare has an audio warning cue that plays roughly one to two seconds before the reveal, and positional triggers fire predictably when you commit to a straight line. Slowing down at doorways and listening before entering a room converts most surprises into expected events.
Does the PETAPETA jump scare guide apply to every platform?
The trigger logic is consistent across platforms, but exact timing can shift slightly with patches and performance differences. Community testing on current builds shows the warning cues and commit windows hold steady, so the habits in this guide transfer cleanly even if frame-perfect timings vary.
PETAPETA's scares are designed to be learned, not endured, and the players who enjoy the game most are the ones who treat each scare as a puzzle to solve rather than a punch to absorb. Map the triggers, practice your routes, and keep your inputs calm during the reveal — do that, and the game's horror shifts from a threat into a rhythm you can read.