
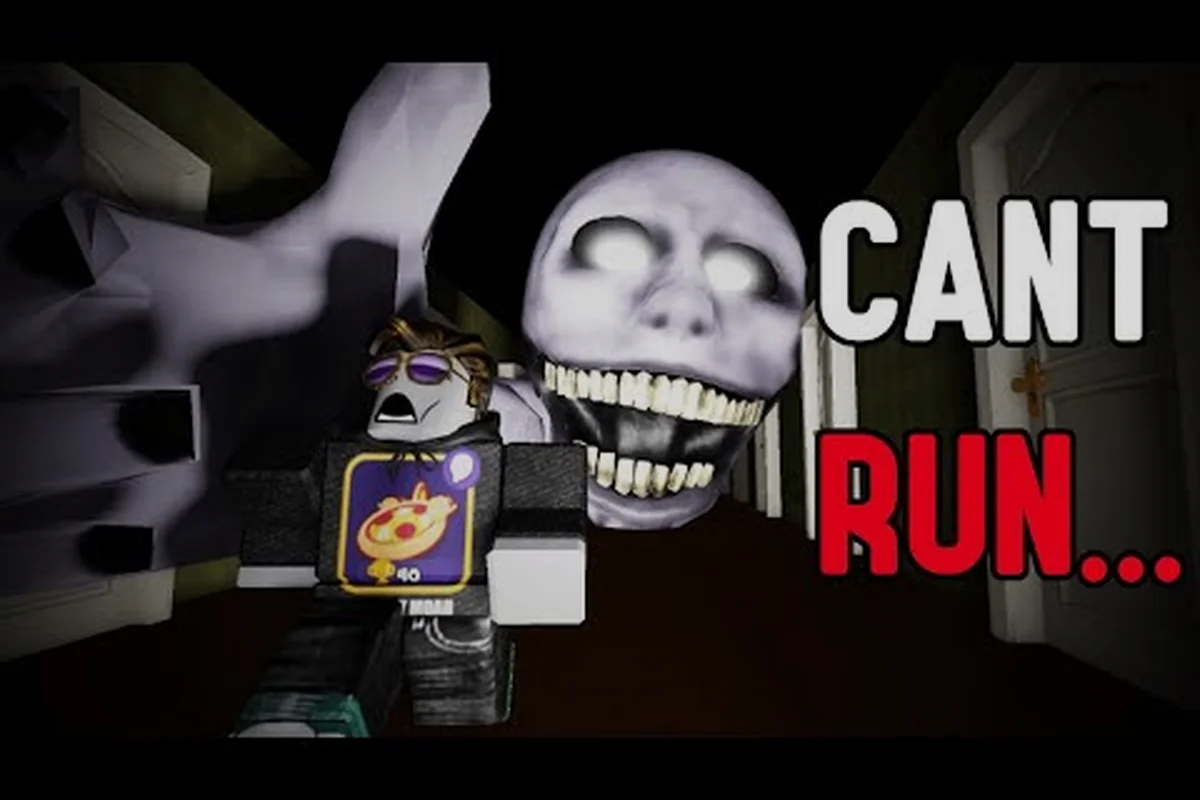
The PETAPETA jump scare monster is the reason so many players play with the lights on, and knowing which encounters actually punish you changes how you survive them. This breakdown ranks every scare and death scene so you can brace for the worst moments instead of getting blindsided.
How PETAPETA Monster Encounters Actually Work
Not every scare in this game is a scripted scream. The design leans on two separate systems: ambient tension that builds over minutes, and hard-triggered events that fire the moment you cross a specific line. Understanding that split is the core of any useful PETAPETA jumpscares guide, because it tells you which moments you can control and which ones you simply have to endure.
According to community reports, most first-time deaths come from the ambient system rather than the scripted ones. Players get comfortable, stop checking corners, and then a monster that has been quietly tracking them closes the gap. The scripted scares are loud and memorable, but the quiet ones kill more runs.
Here is how the two systems compare in practice: the ambient stalker gives you roughly the length of a corridor to react, since its proximity timer only advances while it holds line of sight on you, which is why breaking sightlines behind a locker or rounding a corner resets the pressure and buys you a full reposition. Scripted scares invert that math entirely — the trigger fires on a fixed room entry or item pickup with no proximity check at all, so no amount of crouch-walking or sound discipline changes the outcome. That asymmetry is why the PETAPETA death scenes tied to set pieces feel unavoidable while ambient monster encounters rarely do.
| Encounter Type | Trigger | Warning Signs | Player Control |
|---|---|---|---|
| Ambient stalker | Proximity over time | Footsteps, light flicker, audio drift | High — you can break line of sight |
| Scripted scare | Fixed room or item pickup | Almost none | None — must be endured |
| Chase sequence | Crossing a threshold | Music shift, door slam | Medium — route memorization helps |
| Death scene | Failed escape or grab | Brief grab animation | Low — reaction window is short |
The practical takeaway is that ambient stalkers reward awareness while scripted scares reward preparation. If you know a room is a set piece, you stop trying to outplay it and start bracing for it. Concretely, that means spending your attention budget where it pays: keep your head on a swivel and check corners in open corridors, because that is where the proximity timer is quietly ticking and where most PETAPETA monster encounters are actually decided, but stop burning stamina on crouch-walking through a room you already recognize as a trigger point. The table above makes the split explicit — the ambient stalker row offers high player control and visible warning signs like footsteps and light flicker, while the scripted scare row lists almost no warning and zero control. Treat the death scene row as your cue to rehearse the grab-escape reaction window rather than the approach, since a failed escape there is the one outcome no amount of sightline discipline will save you from.
Why the Audio Design Carries the Fear
PETAPETA does most of its work through sound rather than visuals. The monster often appears in your peripheral vision a half-second before the scare lands, but the audio cue arrives earlier still. Players who learn the difference between the low drone that means "something is nearby" and the sharp sting that means "it is already here" survive noticeably longer.
Community testing suggests the audio tell precedes the visual by roughly one to two seconds in most encounters. That window is small, but it is enough to turn a death into a dodge if you are listening for it rather than watching for it.
PETAPETA All Jumpscares Ranked by Intensity
Ranking scares is subjective, but the community consensus is fairly stable. The list below orders the major scare types from mildest to most punishing, factoring in how hard each one is to predict and how much it costs you when it lands.
| Rank | Scare Type | Predictability | Cost of Failure | Overall Intensity |
|---|---|---|---|---|
| 1 | Distant silhouette | High | None | Low |
| 2 | Light flicker fake-out | High | None | Low |
| 3 | Corner peek | Medium | Minor | Medium |
| 4 | Door slam ambush | Medium | Moderate | Medium |
| 5 | Ceiling drop | Low | High | High |
| 6 | Chase grab | Low | Run-ending | Very high |
The top of this list is where the PETAPETA scariest monster moments live. The ceiling drop and the chase grab are the two encounters that consistently show up in player death compilations, and both share the same trait: the warning is short and the punishment is immediate.
The Ceiling Drop
This one catches players who hug walls. The monster descends from above in rooms with exposed rafters, and the audio cue is a soft scrape rather than a scream. Because the scrape blends into ambient noise, most players miss it on their first pass. Looking up before entering a rafter room is the single cheapest habit you can build.
The Chase Grab
Once a chase starts, the monster closes distance faster than your base movement speed in short bursts. The grab itself is the death scene — there is no struggle mechanic, just a brief animation and a reset. Route memorization matters more here than reflexes, since the escape path is fixed per room.
PETAPETA Death Scenes and What Triggers Them
Death scenes in this game are short, sharp, and deliberately unglamorous. They exist to reset tension rather than to punish you with long cutscenes, which is actually good news: you lose seconds, not minutes. The important part is knowing what put you there.
| Death Scene | Trigger Condition | Typical Cause | Recovery |
|---|---|---|---|
| Grab death | Failed dodge during chase | Panic turning | Instant respawn at checkpoint |
| Ambush death | Entering a marked room unprepared | No light source ready | Short respawn delay |
| Fall death | Missing a jump during escape | Rushing a known route | Instant respawn |
| Stalker death | Standing still too long | Ignoring audio cues | Instant respawn |
The stalker death is the most avoidable and the most common. Players stop to read a note, check an inventory screen, or simply catch their breath, and the ambient monster closes the distance. Movement is safety in this game; stillness is a gamble.
If you are dying repeatedly to the same encounter, the problem is usually routing rather than reaction time. A dedicated jumpscares guide covers avoidance patterns in more depth, but the short version is that you should always know your exit before you enter a room.
Reading the Pre-Death Tell
Every death scene is preceded by a tell, and the tells are consistent once you know them. The grab death follows a specific lunge animation. The ambush death follows a light source failing. The fall death follows a camera shift that most players read as a cutscene rather than a hazard.
Learning these tells converts a lot of deaths into near-misses. It also makes the scares more enjoyable, because you start seeing the machinery underneath them. The practical payoff is a pre-emptive dodge window: when you catch the lunge wind-up, sidestep rather than backpedal, since the grab hitbox tracks straight-line retreat but whiffs on lateral movement. Catching the light-source flicker before the ambush lets you pre-aim at the spawn doorway instead of reacting blind. And once you stop reading the fall death's camera shift as a cutscene, you keep control through the drop and land the counter-hit that turns a scripted-looking death into a stagger. Each tell you internalize removes one "unfair" death from your PETAPETA death scenes tally and replaces it with a readable, repeatable counter.
How to Survive the Toughest PETAPETA Monster Encounters
Survival here is less about reflexes and more about preparation. The players who clear runs cleanly are not faster than you; they are simply never surprised by the same thing twice. Below is a practical checklist built from community experience.
-
Keep a light source ready at all times — the ambush death almost always starts with darkness.
-
Look up before entering rafter rooms — the ceiling drop is the cheapest death in the game to avoid.
-
Never stop moving in stalker zones — standing still is the single biggest cause of avoidable deaths.
-
Learn one escape route per room — chase grabs punish hesitation more than slow movement.
-
Listen for the drone before the sting — the audio tell arrives first and gives you a real window.
-
Reset your mental map after every death — treat each death as a routing lesson, not a reflex failure.
The light source rule deserves extra emphasis. According to player reports, the majority of ambush deaths happen in the first thirty seconds of a dark room, before the player has oriented themselves. Carrying light into every transition eliminates an entire category of death.
Building a Scare-Resistant Route
Route planning is the advanced layer of surviving PETAPETA monster encounters. Once you know where the scripted scares sit, you can chain rooms so that you never enter a set piece while low on resources or disoriented. The full monster guide breaks down which creatures appear where, which is exactly the information you need to plan a route that avoids the worst overlaps.
A good route has three properties: it never enters a rafter room without a light, it never stops in a stalker zone, and it always has a known exit within two seconds of any chase trigger. Build those three habits and the death count drops fast.
Which Scares Are Worth Replaying
Some scares lose their bite on a second run, and some do not. The scripted set pieces — door slams, ceiling drops, fixed ambushes — are one-and-done. Once you know they are coming, they become choreography rather than fear. The ambient system is different: it stays threatening because it responds to your behavior rather than a fixed trigger.
| Scare Category | First Run | Second Run | Replay Value |
|---|---|---|---|
| Scripted set pieces | Terrifying | Predictable | Low |
| Ambient stalkers | Tense | Still tense | High |
| Chase sequences | Panic-inducing | Route-dependent | Medium |
| Death scenes | Shocking | Routine | Low |
This is why the ambient stalker remains the scariest monster in the game for experienced players. It cannot be memorized out of existence, only managed. If you want to keep the fear alive on repeat playthroughs, resist the urge to learn exact spawn timings and instead focus on staying mobile and aware.
Players chasing full completion will eventually need to see most of these encounters anyway, and the endings guide explains how the death and retry loop interacts with the game's multiple conclusions. That interaction is the practical reason the replay-value column above matters: every scripted scare you deliberately re-trigger to fill a death-scene log is a retry that can nudge your ending branch, so route your completion runs around the fixed ambushes you have already logged and save the ambient stalker encounters for last. Treat the table as a checklist rather than a ranking — clear the low-value scripted set pieces in a single sweep, then spend your remaining runs managing the high-value ambient system instead of farming predictable door slams.
Frequently Asked Questions
What is the scariest monster encounter in PETAPETA?
Most players point to the chase grab as the most intense moment, because the warning window is short and failure ends the run instantly. The ceiling drop ranks close behind since its audio cue blends into ambient noise, making it easy to miss on a first playthrough.
Can you avoid every jumpscare in PETAPETA?
No. Scripted set pieces fire regardless of preparation, so the best you can do is brace for them. Ambient stalkers and chase sequences are avoidable through movement, light management, and route memorization, which covers the majority of actual deaths. The split matters because it changes how you spend your attention: memorize the fixed trigger points for the grab and ceiling drop, then treat every dark corridor as a live stalker zone where stopping to check a corner is what gets you grabbed.
How many death scenes does the game have?
There are four main death types: grab, ambush, fall, and stalker. Each has a short animation and an instant or near-instant respawn, so deaths cost you seconds rather than progress. The exact presentation can vary slightly by platform and version.
Why do I keep dying in the same room?
Repeated deaths in one spot almost always indicate a routing problem rather than a reaction problem. Check whether you are entering a dark room without a light source, stopping inside a stalker zone, or rushing a known escape route too quickly.
Do the scares get easier on a second playthrough?
Scripted scares do, since you know exactly where they fire. Ambient encounters stay tense because they respond to your behavior instead of a fixed trigger, which is why many players find repeat runs scarier in a quieter, more sustained way.
The PETAPETA jump scare monster works because it mixes loud set pieces with quiet pressure, and the death scenes stay short enough that failure never feels like wasted time. Rank the scares however you like — the practical result is the same: carry light, keep moving, and learn the tells before they learn you.